So, you've embarked on an exciting DIY journey to create your very own Epoxy and wood table. Congratulations, you're in for a rewarding experience! As you approach the finishing stage, one crucial aspect to master is sanding. The right sanding techniques can make all the difference in the world when it comes to the final look and feel of your custom table.
1. Choosing the Right Sandpaper Grits
Before diving into the sanding process, you need to choose the right sandpaper grits. Start with a coarser grit, such as 80 or 100, to remove any rough spots, excess epoxy, or irregularities. Then, gradually work your way up to finer grits like 220, 320, and finally, 400 or 600 for a super smooth finish. Each grit level helps to refine the surface and eliminate any imperfections.
2. Sand in Stages
Remember, patience is your best friend during the sanding process. It's often better to sand in multiple stages, gradually moving to finer grits. Don't rush through the coarse grits, as they are essential for getting the initial shape and flatness right. This ensures that the epoxy resin and wood are perfectly level.
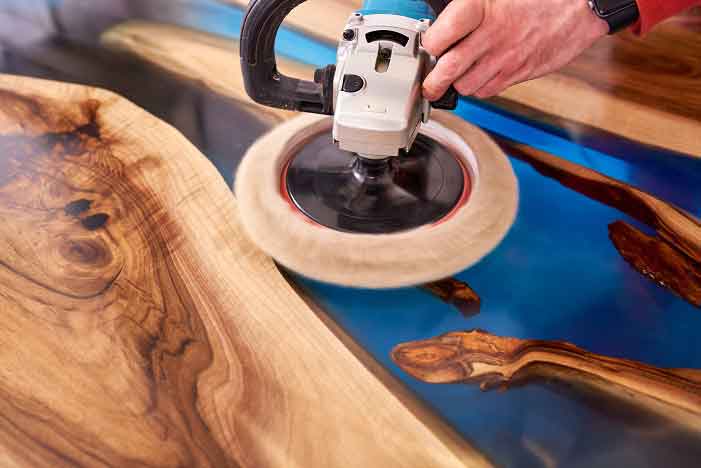
3. Use a Quality Sander
A good quality sander can be a game-changer, especially for larger surfaces. It provides even pressure and prevents over-sanding in specific areas. A sander also helps maintain a flat, uniform surface.
4. Mind the Corners and Edges
Corners and edges can be tricky to sand. Be careful not to overdo it, as this can lead to uneven edges. Use a lighter touch and finer grits for these areas, and consider using sandpaper wrapped around a dowel or block for precise corner work.
5. Dust Control
Sanding generates a lot of dust, and epoxy resin is unforgiving when it comes to capturing those particles. To keep your table clean and pristine, use a dust extraction system and wear a dust mask to protect your health. Frequent cleaning of your sandpaper and surface with a brush and/or compressed air can also help maintain its effectiveness.
6. The Final Polish
Once you've completed the sanding process with your finest grit paper, consider adding a polishing step. This can be done with a polishing compound or wax, bringing out the full luster of the wood and epoxy.